
I last made macarons a couple of years ago, when they first rose to wide-spread popularity here in Australia. Along with their popularity, of course, was their notorious reputation as very difficult little treats to create. Creating macarons with ‘feet’, a light crunch and a beautifully chewy centre is a little tricky but the difficulty is far over-stated, in my opinion. Although they don’t always look perfect, this macaron recipe consistently produces tasty macarons with a lovely texture.
Be warned – this will make quite a few, but don’t worry; they’ll disappear quickly!
I was lucky enough to stumble across this caramel filling recipe and have since made it every time I make macarons. It is truly fantastic; has a rich caramel flavour and a creamy-smooth texture. I usually partially make the filling a day ahead of the macarons, to spread out the workload.
Ingredients:
- 480g icing sugar mixture, sifted
- 280g almond meal, sifted
- 210g egg whites (7 egg-whites)
The first step is to ensure your almond meal is as fine as possible. So, firstly measure it into a slice tray and pop into an oven at 150 and toast for about 10 minutes, until lightly browned.
Allow to cool a little and then place the almond meal in a food processor with about a third of the icing sugar. Process briefly until the almond meal gets a bit finer.
Now sift the mixture into a large mixing bowl to ensure only the finest almond meal gets through. Then sift the remaining icing sugar into the bowl and stir to combine.
To prepare for piping out the mixture, take a bottle cap or glass (I use a milk bottle top) and trace out templates for the macarons onto a sheet of A4 paper, leaving a 2cm gap between the outlines. I tend to cover one A4 sheet and then just lay it each baking sheet as I pipe.
In a separate bowl, beat the egg-whites until soft peaks form. If you wish to add food colouring, add it in to the white now and beat briefly to combine. The egg whites need to be separated from the yolks at least 2 days prior. Set in a bowl, cover and leave in a cool corner of the kitchen to ‘age’. This process gives them better stability to form the macarons.
Once the egg-whites are stiff, fold in about a third to the almond meal mixture and stir thoroughly. Using a large metal spoon, fold the remaining egg into the mix. Do mix it fairly thoroughly, you want to knock some of the air out of the whites.
Now set up your piping bag, standing it in a tall glass and fill it up halfway with macaron batter. Placing your template sheet under a sheet of baking paper and pipe out the macarons, moving the template sheet onto the next baking tray as you go.
You can spoon the mix out if you wish (like I do), but they won’t be as pretty.

As you finish each tray, set it aside to form a skin. I like to leave them for at least an hour, or longer if you have time. You should know they’re ready by gently brushing the top with your finger. If it feels relatively dry, they are ready to bake.
Now heat your oven to 130 and bake the macarons for 15 minutes. If you have not used food colouring, they may colour slightly, although this should be avoided if possible.
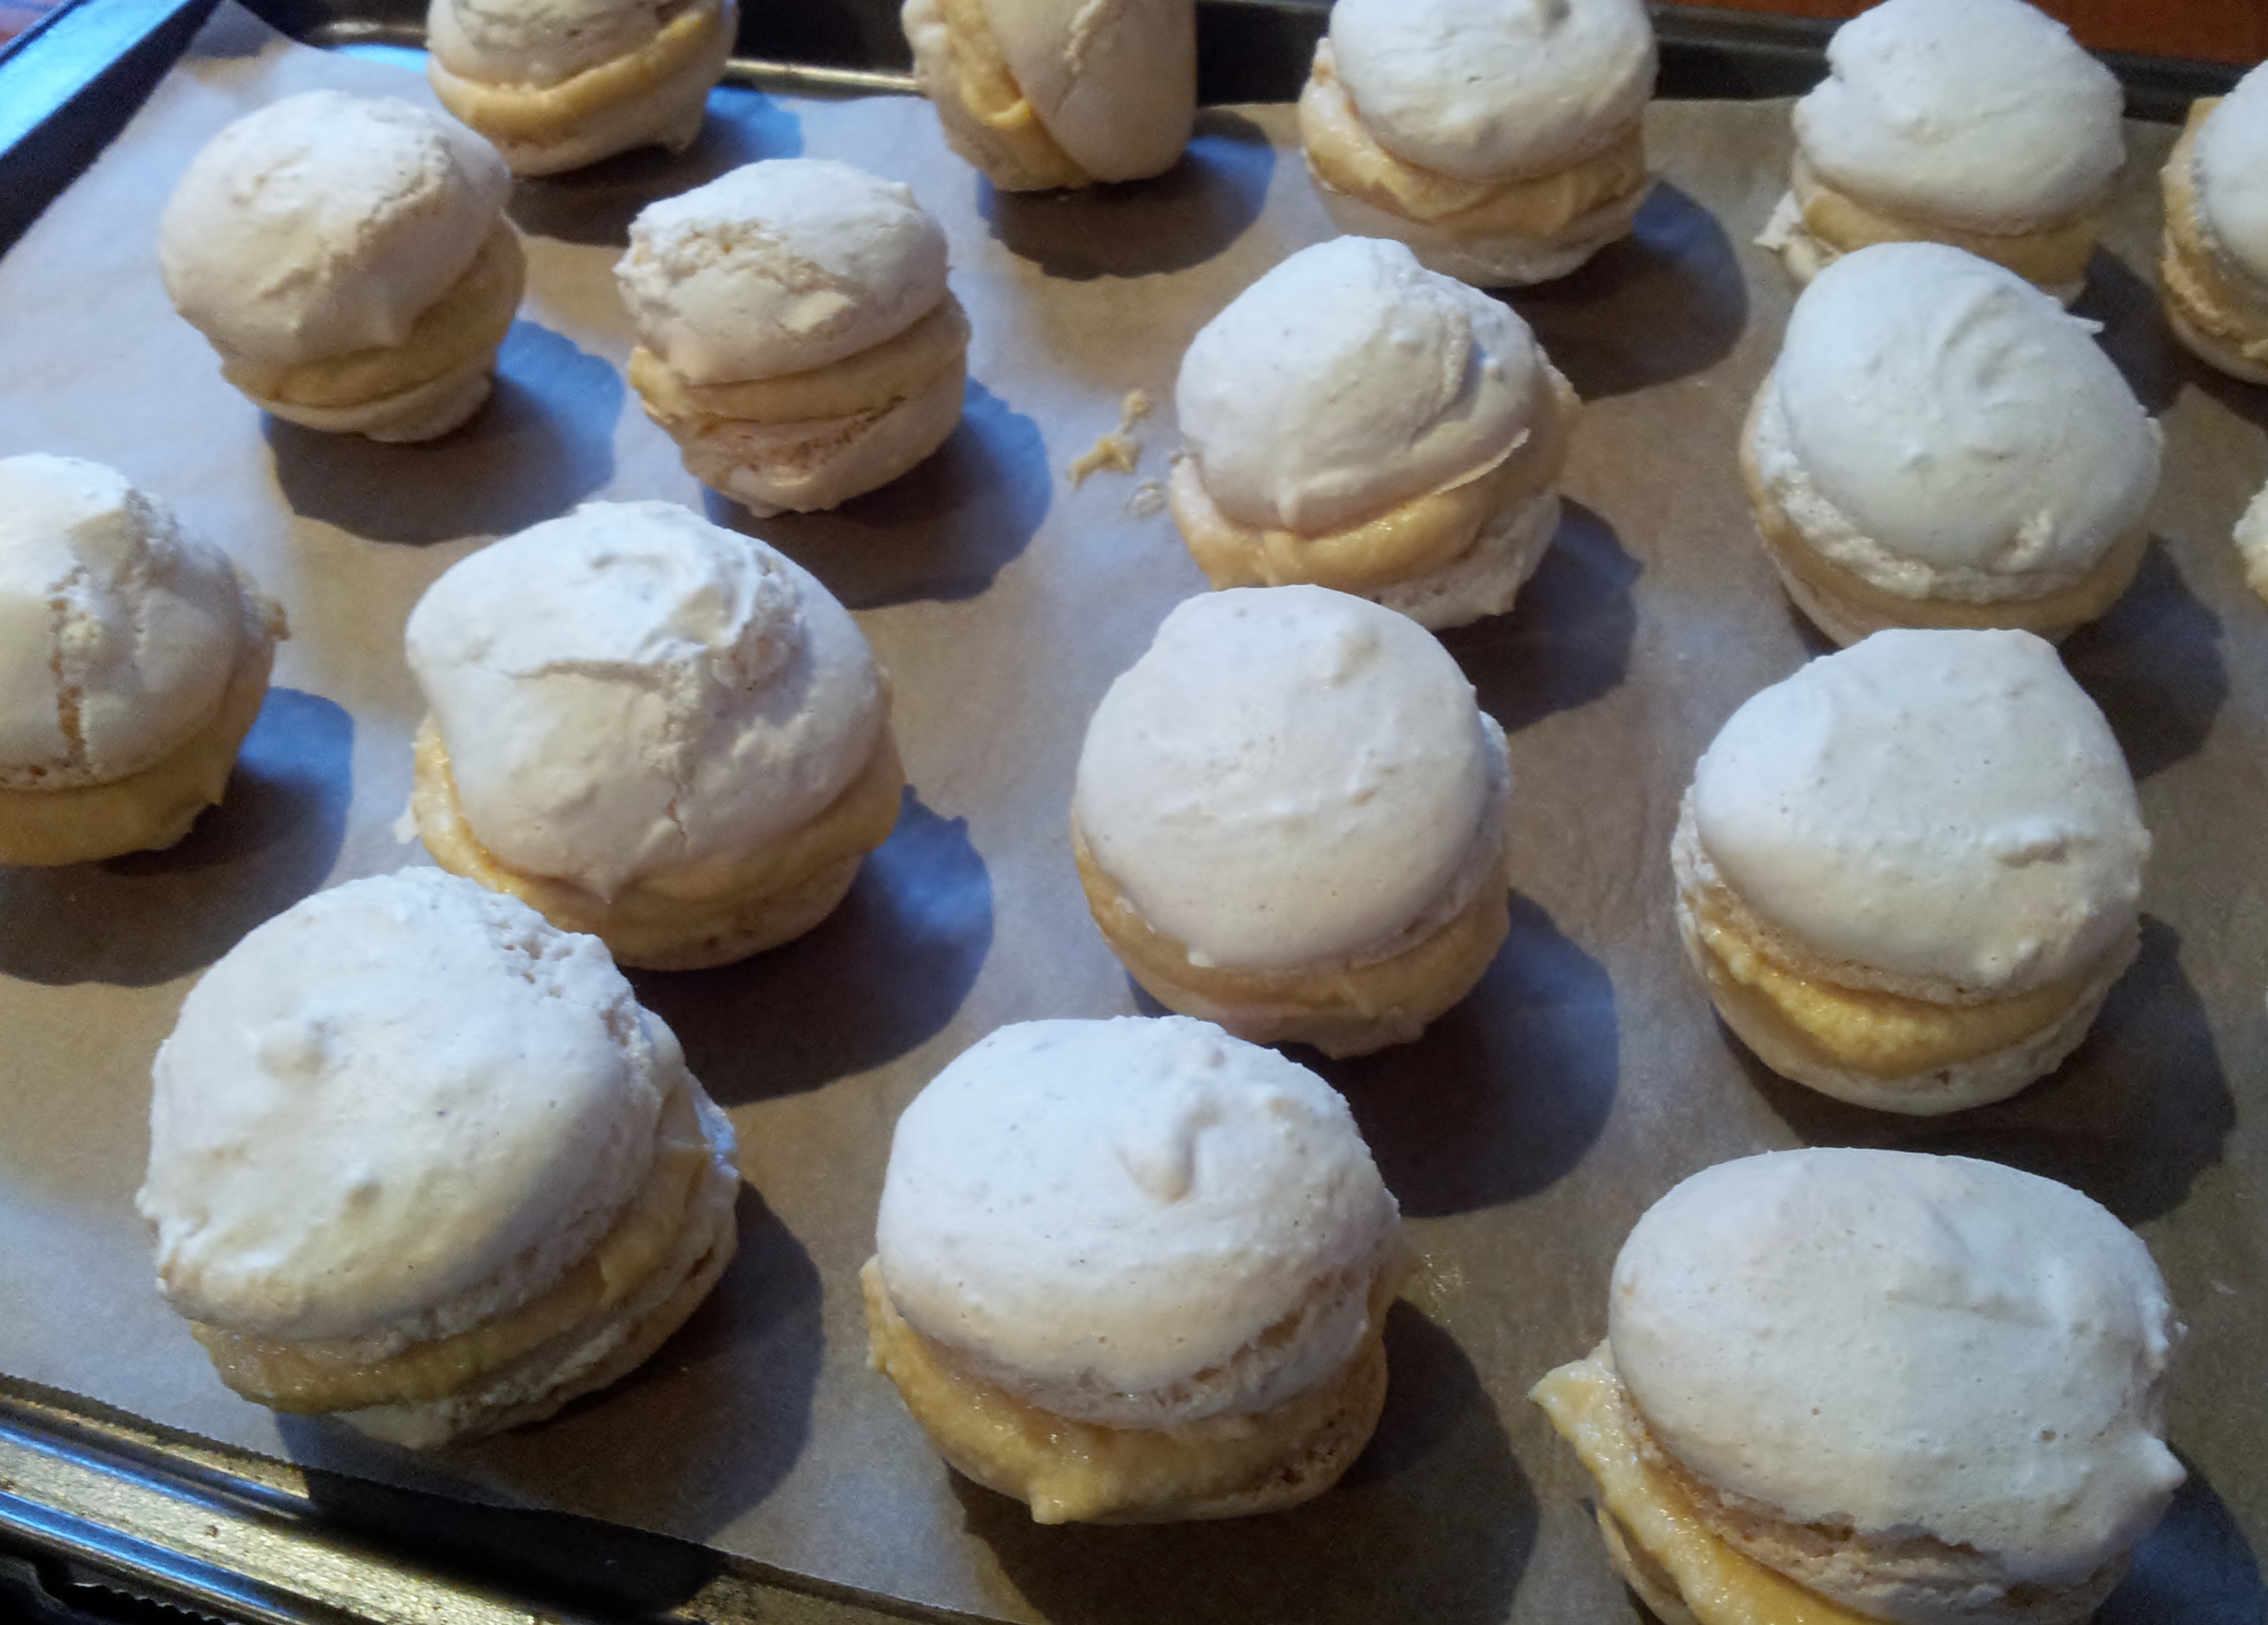
Set them aside to cool on the trays for 10 minutes or more if possible and, when they are completely cold, sandwich them together with the caramel filling (as below) or chocolate ganache or Nutella if you’re in a hurry.
Caramel Filling
Ingredients:
- 300 g caster sugar (or as fine as you have), weighed directly into a non-stick pan
- 335 g cream, weighed into another pan
- 65 g regular (salted) butter
Plus - 170g regular (salted) butter
- 120g cream cheese (Philadelphia)
This first step is the only tricky part about the whole process. You need to make a golden caramel with the caster sugar. Do this by first placing 50g (about a ¼ cup) of sugar into your saucepan and heat until it is completely melted. When it turns a light brown colour, add another ¼ cup of sugar and heat gently until it too has liquefied.
Repeat this step until all the sugar has been used. Using a silicon spoon or spatula (for easy cleaning later), stir the mix every minute or so, to ensure nothing is burning on the bottom. The crucial point for this step is to never leave the stove or stop watching the caramel.
Once all your sugar has been turned into a golden caramel, heat your cream (separately) to boiling point (but don’t actually boil it). While the cream heats, remove the caramel from the heat and add 65g of the butter. The mixture may bubble furiously, so take care and watch as it could ‘spit’. Once it has calmed a little, stir well until the butter is incorporated.
Now pour in your heated cream and stir well. Again, watch for any burning projections! The caramel will seem unwilling to mix with the cream but persistence and gentle stirring will amalgamate the cream eventually.
Now put your caramel pan back on to the heat and bring the whole mix up to 108º. If you don’t have a thermometer, just bring it up to the boil and allow to boil for about 3 minutes. Then turn off the heat and let it cool a bit.
Pour the mix into a flat pan (like a brownie tray) to cool. Cover with glad wrap (but don’t let it touch the caramel or it will stick!) and set aside to cool completely. It needs to be at room temperature at the warmest before moving on to the next step. (I usually refrigerate it over night and then continue with the filling the next day).
For the last step, place the softened butter and cream cheese (preferably at room temperature) in a bowl and beat together with your electric beaters until they are light and fluffy, forming stiff peaks. The butter should lighten in colour.
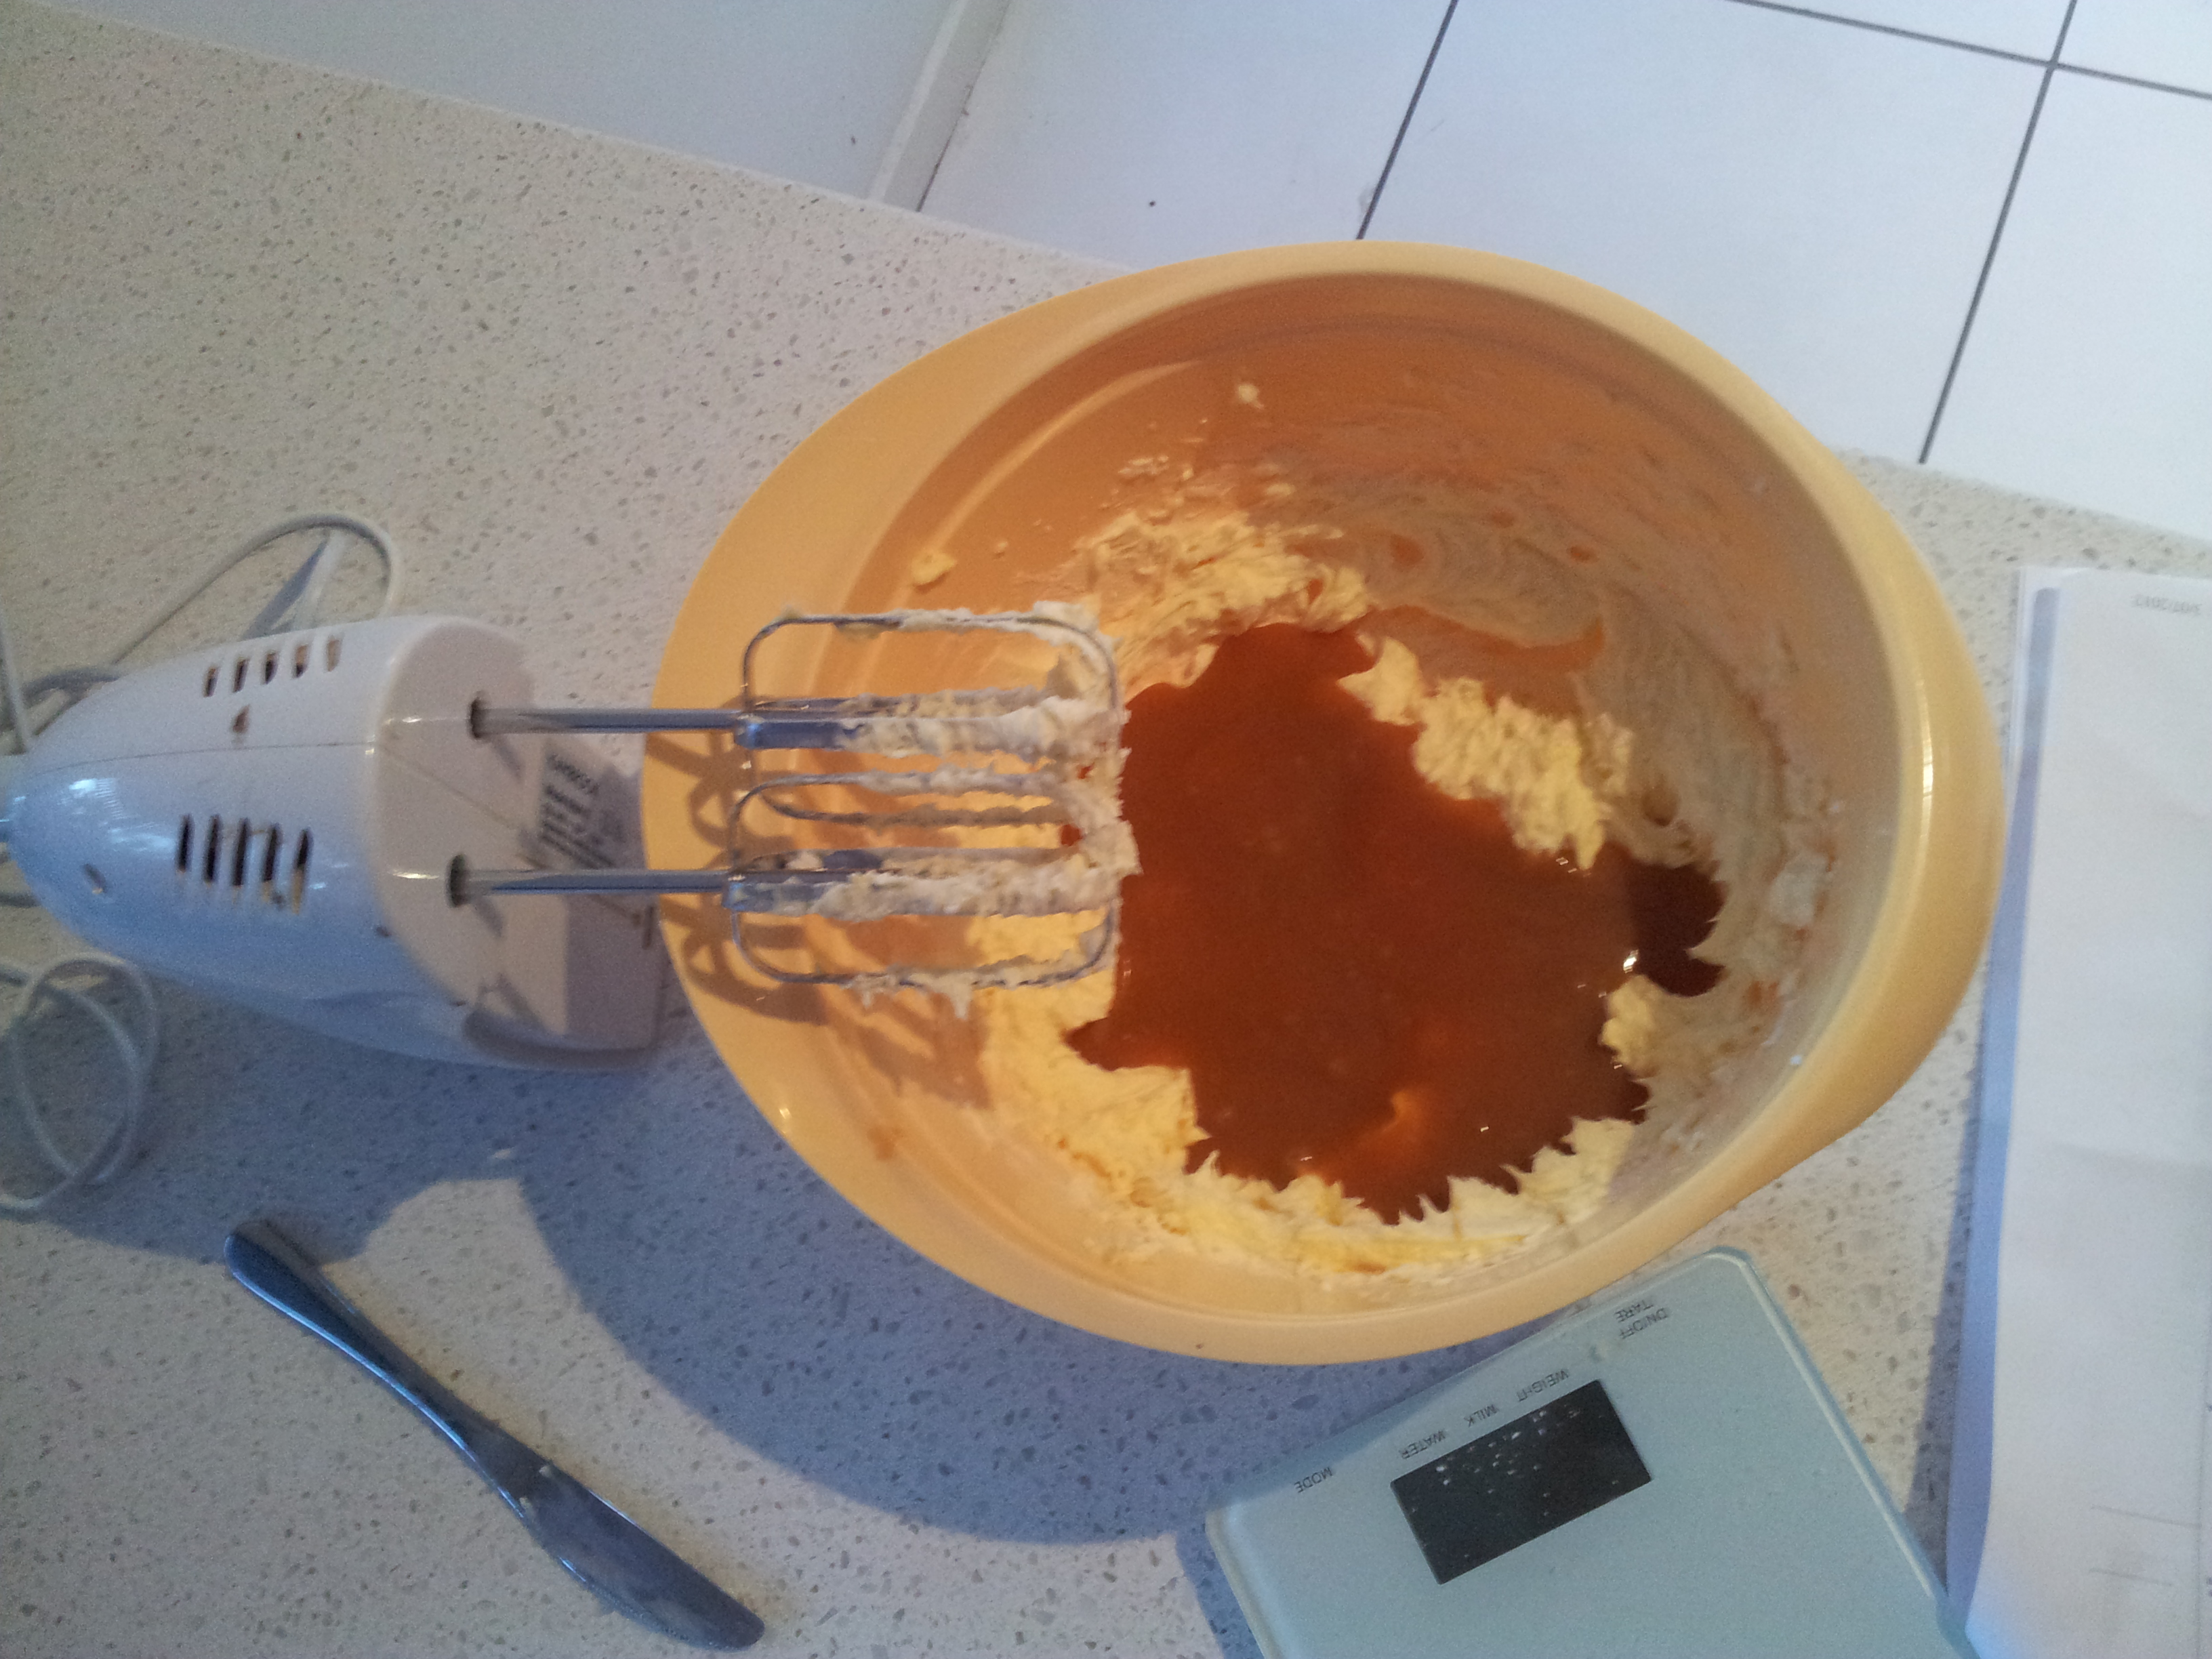
Now add half the caramel and whisk until incorporated. Then add the remaining caramel and beat until just mixed through, taking care not to over-whisk it.
You can either use this filling immediately or refrigerate for later use.
If you have stored the caramel butter cream filling in the fridge, bring it to almost room temperature before using.
Now, the fun part! Pipe a generous amount of the caramel butter cream filling into one cookie (the inside part). Top with the other cookie shell.
One last hint; as soon as you pour the caramel out into the brownie pan, run both the saucepan and the spatula under very hot water so the caramel doesn’t harden.
This recipe makes a huge amount of filling; it will sandwich together 40 macarons with about half leftover. You can either halve this recipe or use the leftover filling to sandwich together sponge-puffs, shortbread biscuits, or even a Victoria Sponge cake. Whatever you add it to, I can guarantee it will be devoured.

1 Comment