
One of my colleagues is shortly due to have her first baby. As she has only moved here recently from Ireland, and has no female relatives in Australia to throw a baby shower, the girls at work felt we would like to throw one for her. My contribution, naturally, was the cake.
Having seen the myriad of possible shapes and forms a baby shower cake can take, I settled on a fun design at a beginner level. Although my cooking and baking experience is extensive, my decorating skills are extremely basic, bordering on non-existent.
Initially having chosen this cake on the assumption that I could buy ready-made fondant icing, I soon found that this was not the case in Brisbane (yet again). So, searching the web while strolling the supermarket aisles, I found this recipe for marshmallow fondant. Honestly, it was a complete experiment and I expected nothing more than a sticky mess and two un-iced cakes.
What I got instead was a professional-looking fondant that was so easy to work with I fear it may become an addiction.
Whether you’re looking for a fondant to cover your christmas cake as a pretty gift or something easy to work with on complicated cake shapes, I would urge you to try this fondant, even if you have never made any fondant before.
I cannot claim the design as mine; I got the idea from the Wilton website – unsurprisingly, they have hundreds of pretty cake ideas at a range of skill levels.
To make the ‘Naturally Curly’ Baby Cake you will need;
Cakes:
- 1 x 20cm round cake (I made the store-cupboard chocolate orange cake) for the body
- 1 x 22/23cm round cake (I made Stephanie Alexander’s Orange Cake) for the head
Icings:
Buttercream icing
- 4 cups icing sugar
- 50g butter
- milk as needed
Fondant icing (pink)
- 450g mini marshmallows (8 cups, not packed). Regular size will work too. Pink only or pink and white, no other colours.
- 8 cups icing sugar, plus extra for dusting
- 4 tbs water
Fondant icing (white)
- 225g white mini marshmallows (4 cups, not packed)
- 4 cups icing sugar, plus extra for dusting
- 2 tbs water
- Black paste food dye (for eyes and mouth)
Equipment:
- Very large cake board for serving. At least 60cm x 40cm.
- Disposable rubber gloves (for black dye)
- 5 toothpicks
- 1 round biscuit or 2 pieces of semi-circle cardboard
Assuming you have made your cakes the day before (which I would recommend because the making and rolling of the icing is quite time-consuming), begin making one batch of marshmallow fondant by placing the marshmallows and the water in a microwave safe bowl. Microwave on high for one minute, until the marshmallows are fluffy and partially melted.
Remove from the microwave and stir briskly with a silicone spatula until smooth (microwave for a further 20-30 seconds at a time if some pieces remain solid, until all are melted).
Add in the icing sugar and mix using a cutting motion with a butter knife, as you would to amalgamate bread dough.
Generously flour your bench and your hands with icing sugar (or cornflour) and turn the mixture out when it starts to clump together in the bowl.
It will still be sticky and lumpy, with lots of sugar that has not been incorporated yet but don’t worry, this is how it should be. Dust your hands with powdered sugar, and knead the fondant mixture like bread dough, working the sugar into the marshmallow with your hands.
Continue to knead the fondant until it smooths out and loses its stickiness. Add more sugar if necessary, but stop adding sugar once it is smooth; too much sugar will make it stiff and difficult to work with. Once the fondant is a smooth ball, it is ready to be used. If you want to work with it later, you can wrap it well in glad-wrap and store in a cool room or in the fridge (note that if chilled, it will need to come back up to room temperature and be kneaded until soft before you can use it).
Assuming you wish to decorate the cake straight away, first cover the fondant in glad wrap and set aside on the bench. You will need to make the buttercream icing to cover both cake, to form a ‘glue’ and layer of moisture between cake and fondant. To do this, simply beat together the melted butter and icing sugar, adding a little milk if required, to form a strong but smooth icing. Cover both cakes in the buttercream icing, top and sides, to form a ‘crumb coat’.
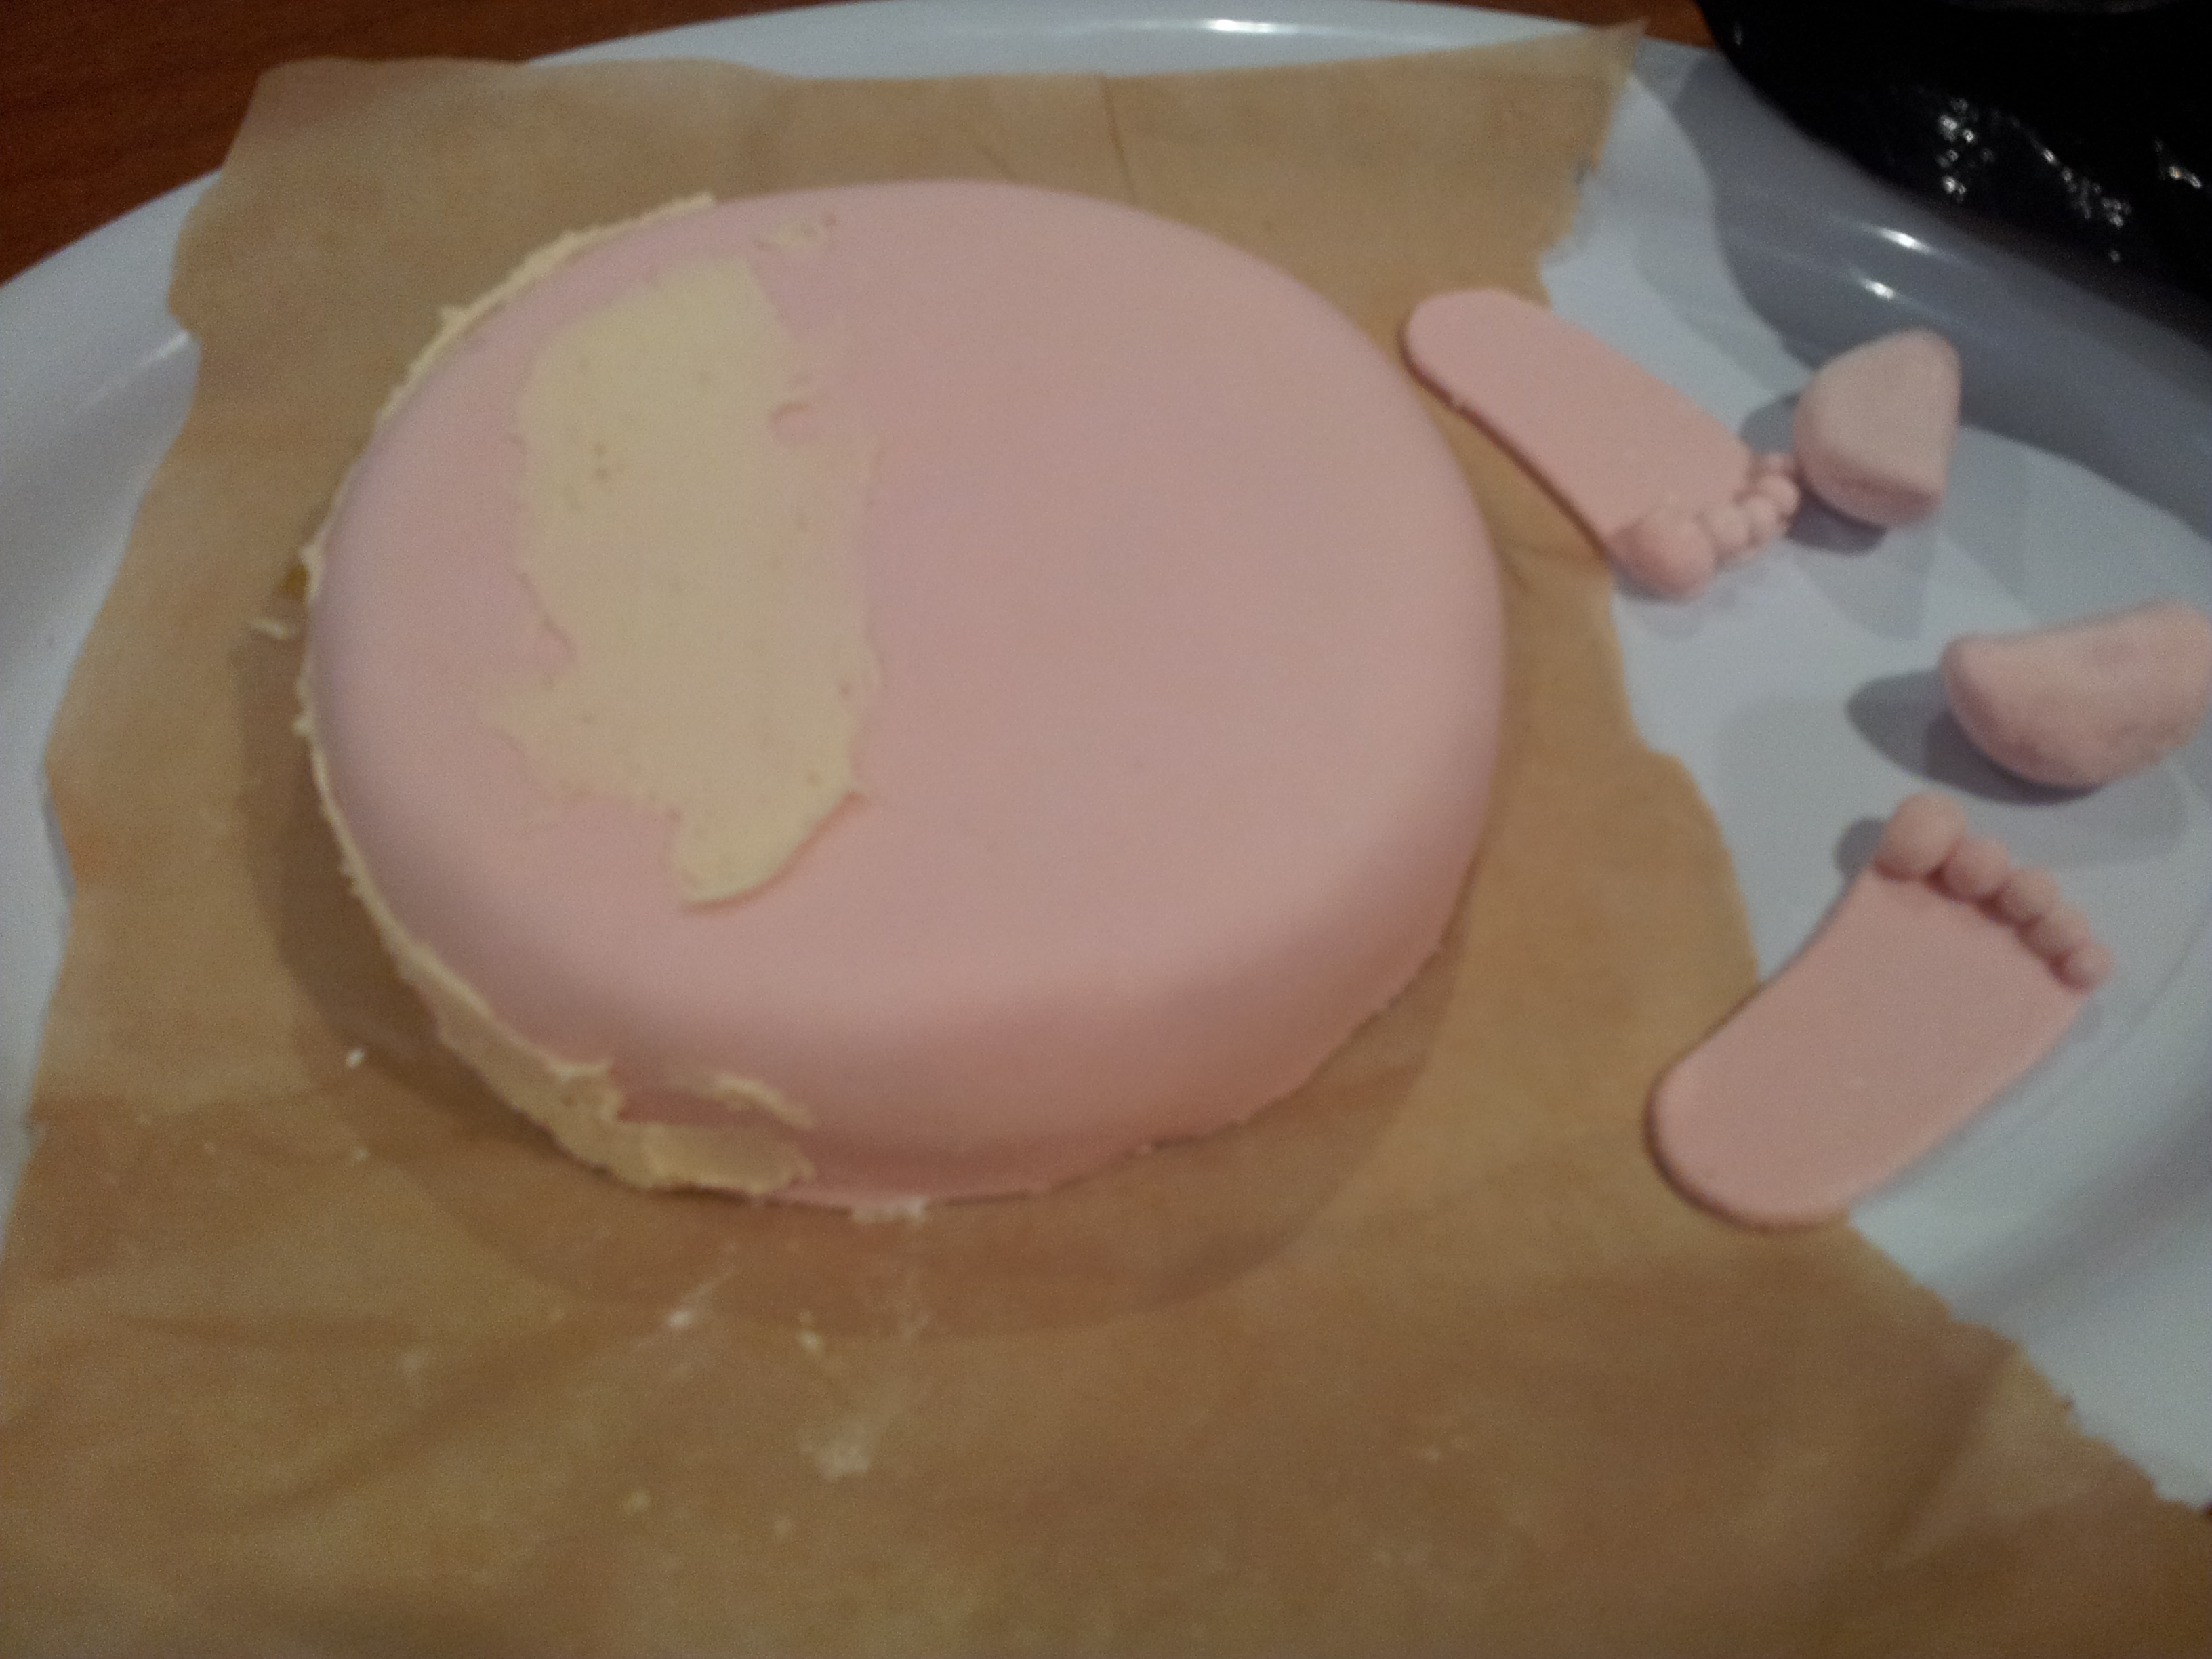
Now take the pink fondant and roll it out no thinner than 5mm. Remember to constantly dust your bench with icing sugar and turn the fondant so it doesn’t stick to your bench. When you are ready to cover the cakes, drape the fondant over the rolling pin and lift gently over the cake so that it drapes over the sides with a 2cm overhang. (Remember that using this pink fondant, you will also make arms, ears, feet and toes so be sure to allow enough fondant for these extra bits).
Gently shape the fondant over the cake, pressing gently to the cake to adhere fondant to icing. Using a butterknife, gently cut the excess fondant away, leaving a 5mm skirt. Tuck this skirt under the cake, turning as you go. You should now have a smooth, covered cake. Repeat to cover the second cake.
Once both cakes are covered, make the white icing using the same method as before. Roll out the white fondant and cut a straight line along one edge. Taking the smaller of the two cakes, place a little buttercream icing where you will attach the nappy and line up the straight edge of the white icing with the buttercream icing. Smooth the white fondant across the top half and sides, trimming and tucking the excess as mentioned earlier. Position the bottom cake and top ‘head’ cake on your serving board.
To make the feet, print the template from the Wilton website and use them to trace the feet out of paper. Make each toe by rolling a small ball of pink fondant until you have the correct size. I found each piece had to be kneaded a little to give a smooth finish. Glue toes to feet using the icing and then attach the feet to the nappy, again using the buttercream icing. To make the arms, simply shape logs of the pink fondant about 15cm long and position by the body on the serving board.

Finally, to make the face; take a small amount of the white icing and the black food dye paste. Putting on the rubber gloves (to prevent staining), pop the white fondant in the microwave for 10 seconds. Remove, flatten roughly and add the black dye to the fondant. Fold over to enclose and knead the fondant until the dye has been evenly distributed. If the colour is even but too light, add a little more black paste and repeat. When you are happy with the colour, roll out a very thin, long piece (about 20cm). Place a toothpick at one end and cover half of it with the fondant. Now form a curl and pierce the top of the head with the toothpick, arranging the curl so it will dry in shape.
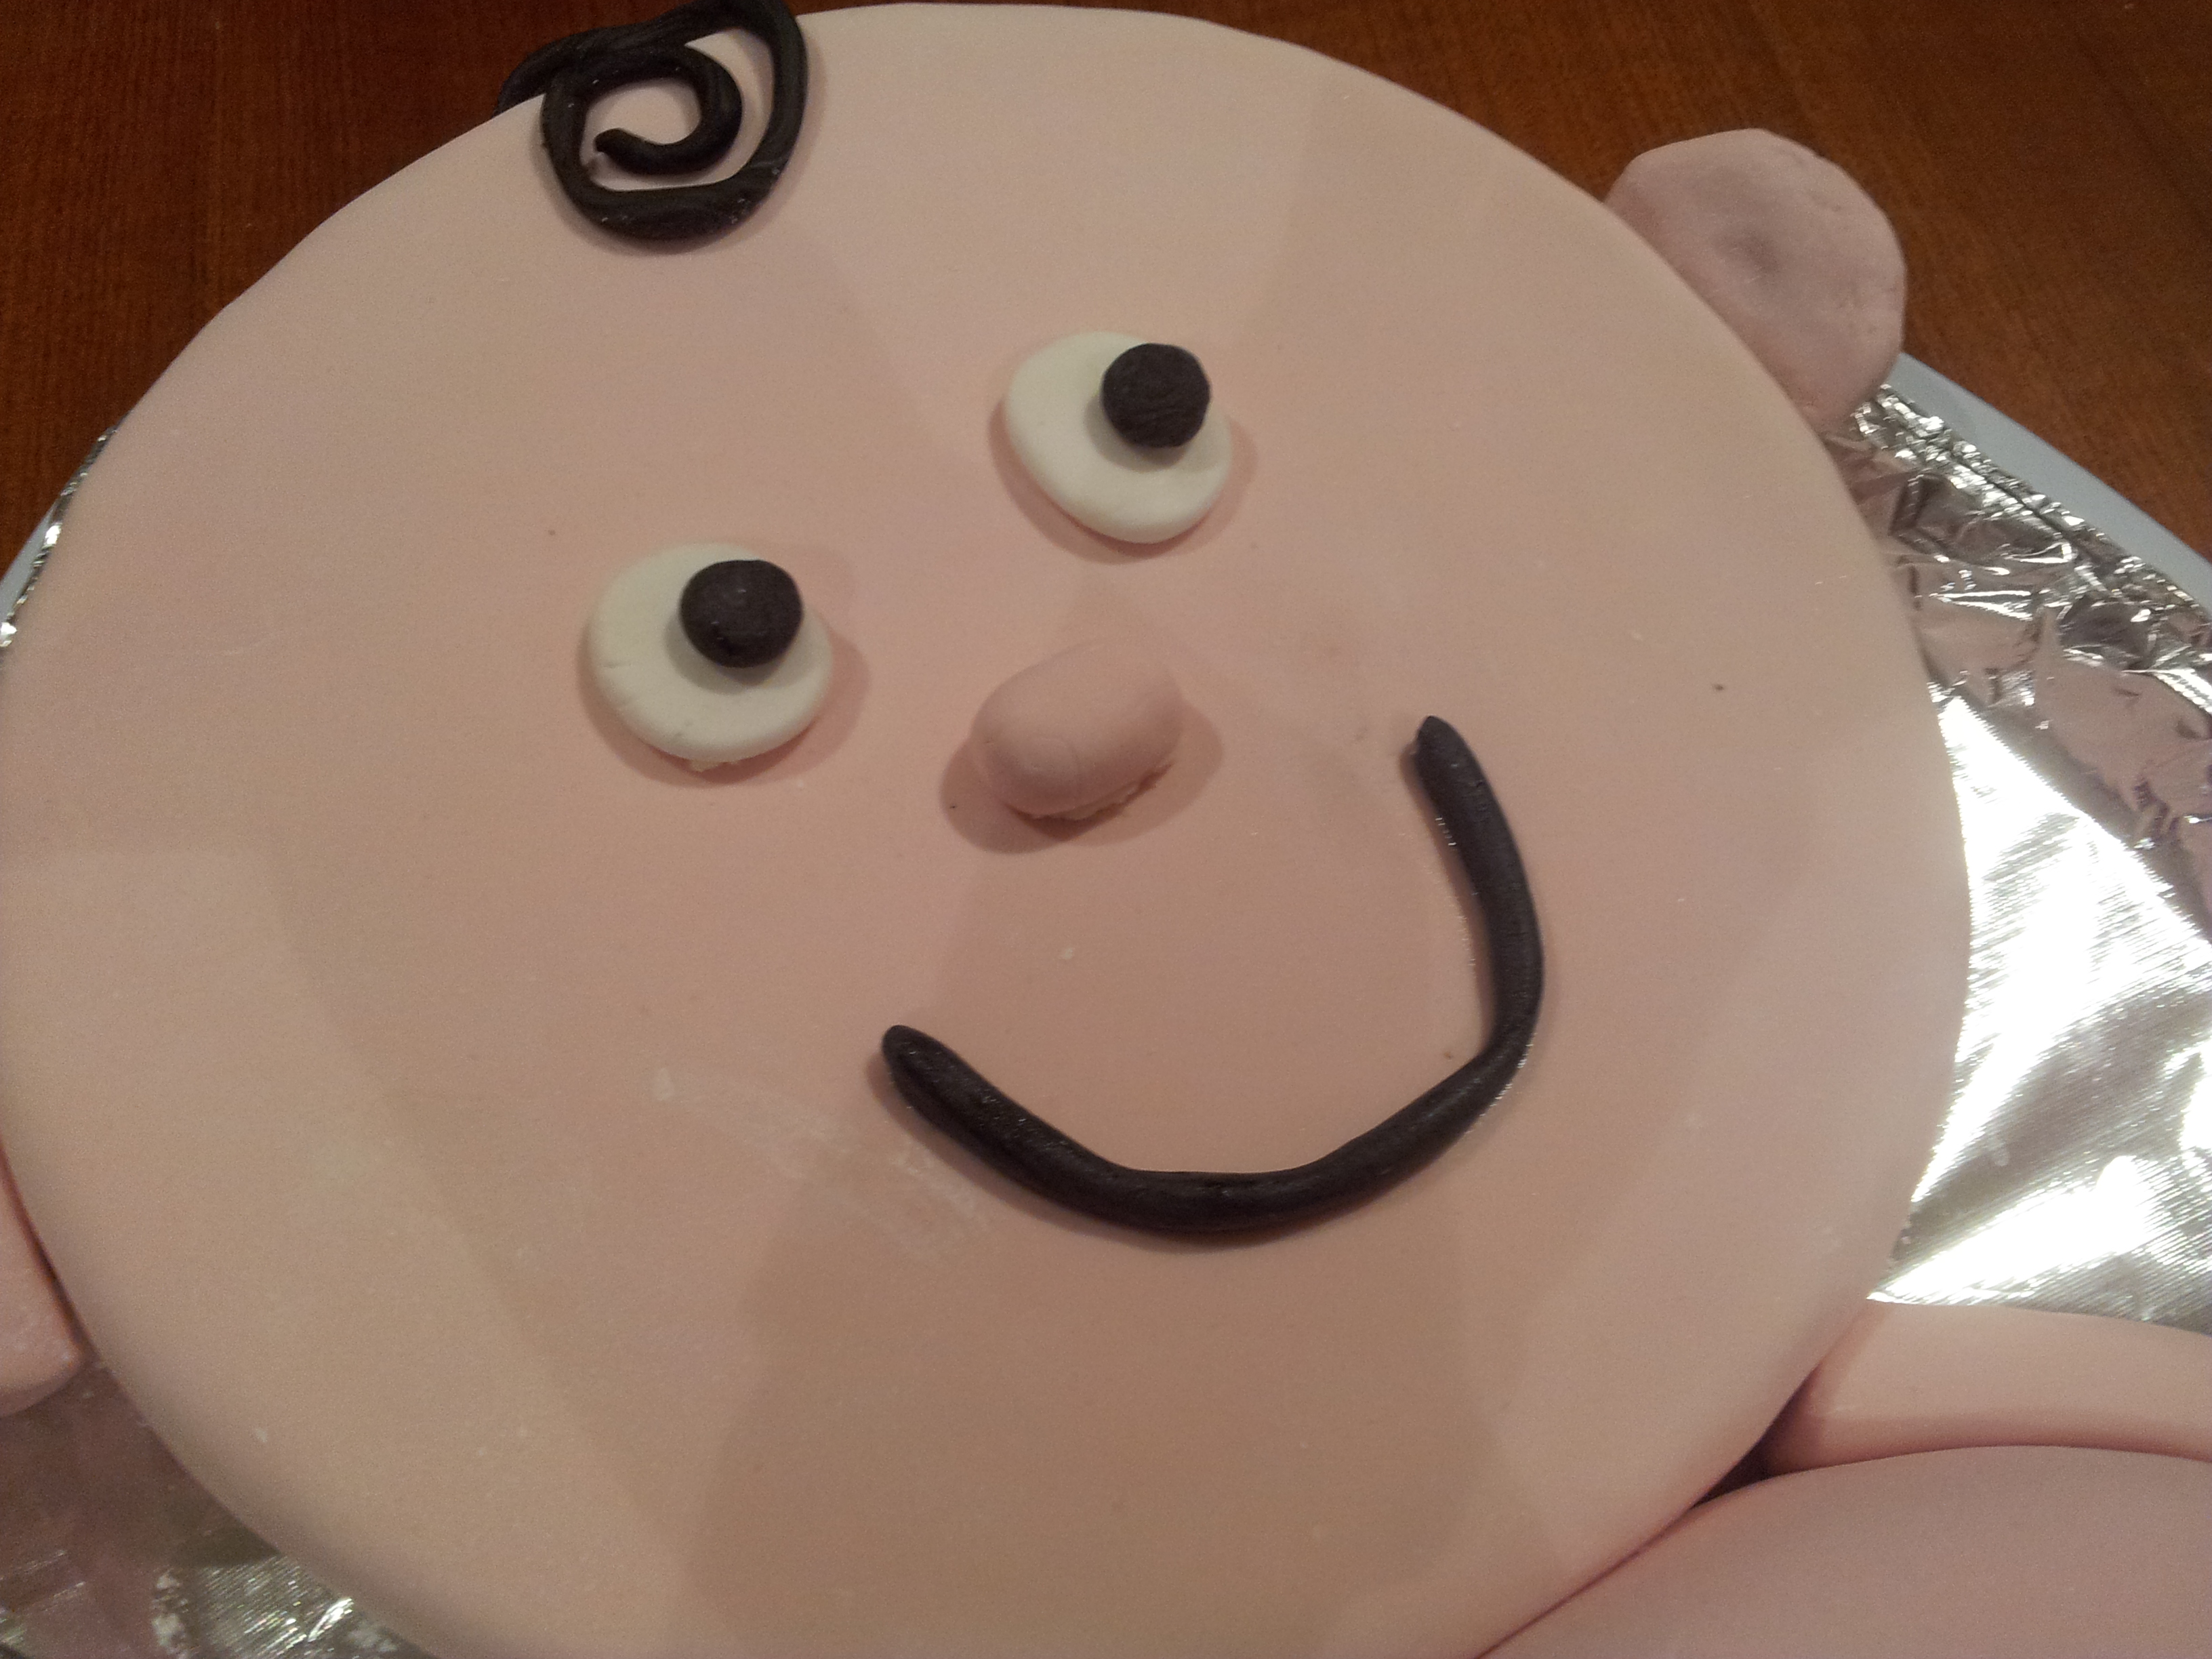
Finally,to make that cheeky grin, roll a very thin 10cm piece of black fondant and set aside to dry for a little (or the black dye may bleed into the pink face). Make two equal small black ovals for the pupils and two larger white ovals for the whites of the eye (if you wish). Using the pink fondant, wrap the cardboard semi-circles (or a halved biscuit), join the seams and then insert 2 toothpicks per ear. Push one ear into each side of the head. With the last of the pink fondant, roll a small oval ball to form a nose. Attach all parts of the face with buttercream icing as you wish; I found this part the most enjoyable and played with positions for some time before icing them in place.
I’ll admit, I spent so long working on this cake, I became somewhat attached to it. But it was certainly one of the most enjoyable cakes I have made and well worth the effort to surprise the mum-to-be.

1 Comment